Posts

Project 2 Planning.

Image
These are some basic notes that I made when planning my idea out for project 2. Here I am just planning out what kind of systems I would like the game to have and what they would need to do for them to be functional. Systems needed: 1. Resource Gathering: A World with assets in it, the assets must also have some basic models for them. (e.g. rocks, ice and metals) A way to break said assets and collect them. (e.g. walk up to them and they fly into your inventory or you have to pick them up) A way to set up an automatic automated system to collect and gather resources. A UI to display how many resources you have left. 2. Survival System: Some kind of Health, hunger, thirst and oxygen tracking system that is relative and interactive with the amount of "work" you do. (e.g. run around, break things.)  A UI to display how much hunger, thirst, oxygen and health you have left.  A way to convert water into oxygen.  3. Game Play: How will the low gravity affect...

Unit 8: Game play

Unit 8: Things I'm proud of in my Project.

I've recently been thinking about certain things in my project that make me proud to call it my own. Here is a video of the things that I'm most proud of in my project.

Unit 8: Evaluation of my Project.

Image
My original aims for this project was far different from the final outcome. I was planning on working on the aesthetics and environment of the game as well as the sound and audio aspect of the project but, as I started to work on the models and audio I realised that I was really poor at it and my strengths are in programming. For my research I did a few things, I read a few books, watched a few films and played through some games. But the thing that I felt myself thinking about the most was "how can I add uncertainty into my game?" and this was because of the book called "Uncertainty in games" (You can read about it in my blog about it here ). It made me consider how the player would think about navigating the environment. (Image shows the player contemplating whether or not they can make the jump.) I'm quite proud of what I've actually achieved in this project, and that's partly due to my realisation that I can't make a fully-functioning...

Unit 8: Making The Levels for my Climbing System.

Image
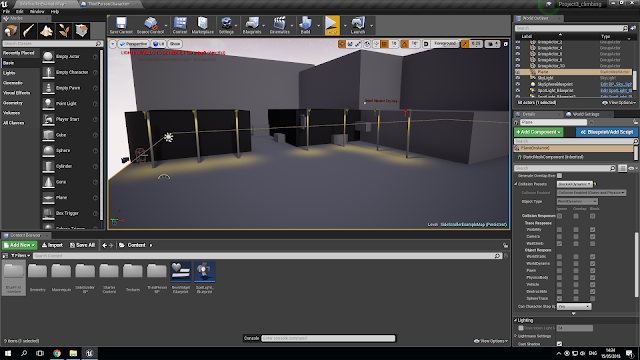
Today my plan is to make an environment for the player to climb in and explore, it's not going to be massive but hopefully, it displays what my climbing system can do. I will be doing this in a grey box because as I discovered today, soul city model pack isn't in the version of unreal that I am in. So I began with where I started a while ago now. Unforcenetly the footage of me making the environment got corrupted and I can't get it back. I will record what I still have to do but here is a screenshot of what I have done. Here is a video of me adding to it: I'm very happy with the result and I showed a few of my peers and they gave me some feedback, for example, someone said that they " really liked the foreground stuff and that you should add on it". Due to this positive feedback, I added more foreground objects to help make the player blend into the environment. 

Unit 8: Adding Sound To The Animations

Image
Today my plan is to add sounds and maybe particles to my animations to make the player feel more grounded in the game world. I started by getting the sounds that I need from a website called Freesound, they provide long clips of foley sound that are downloadable as a wave file. I then took the file into Audition and clipped it into different sound files as you can see here. I then imported the files into the unreal engine and added them into a "sound cue". I did it this way instead of just using the sounds is so that I could add a modulator and a randomator so the sounds were never the same. This adds some variation to my game. Here is the video of me adding it into my project. I'm very happy with the final result and I will be adding more sound to my game. Looking back at the process now, it's a very easy and effective way to make the player feel grounded in the world and I'm really happy with the results. Here is the finished thing....

Unit 8: Last Week of the Project

Since this is the last week of the project I would usually dedicate this time to bug fixing but, I've fixed most of the bugs that I have found from the demo days and what I found from playtesting in as I found them. but there are a few things that I wish to do before this project finishes. I would like to make some levels for the player to actually play and run through. I am most likely to just grey box a level as that is the fastest and easiest way to it is but, I might use the soul city mesh and material pack on the marketplace for unreal. Here is the link to it . I Would use this instead of making my own meshes and materials because I don't have the time nor the know how to make my own models. I also want to add some sound the to animations, this is easy enough to do, you just add a sound notify on the animation. I would also get the sounds from somewhere online as I don't have enough time to record them myself. I would also like to smoothen out the grabbing animat...

Unit 8: Stopping the rolling system.

In the past few days, I have been trying to get certain animations to work with unreal's default mesh and skeleton. I have spent hours trying to get these animations from other sites as well as mixamo and no have been successful. This has lead me to come to the conclusion that I will never be able to get them to work with my current tools and limited experience. I have also considered other methods of getting these animations to work, such as changing the mesh and skeleton but this would require me to redo all of the animation blueprints as unreal doesn't let you change the skeleton or mesh on theirs.  After considering all the time ive spent on it so far and how long it will take to change everything, I think I'm just going to leave it out of my game. I can not see myself completing it before the deadline. I have other things that I need to add such as sound and a full level for the player to play through. I wish I had more time but to pr...

Unit 8: Adding the Roll to the Falling

Image
Today I began work on the roll after the long jump. This, of course, wasn't as easy as it seemed. I began how I normally would, by getting my assets and working making sure they will work before I start coding. So I uploaded the unreal preset character to Mixamo and downloaded the character and this is what happened when I imported it to unreal. When I imported it came up with the message log and I thought, well it must be something to do with unreal and not the animation itself. I asked a few of my peers what the problem may be and they said that " it's one of the most common problems for unreal, just look it up there should be a fix for it." So I went for the unreal form pages and found that the skeleton for the unreal character isn't compatible with Mixamo animations. After that, I continued to try and get the animation with a character mesh that Mixamo provide and convert it to the unreal character. Here is a video of me doing the process....

Unit 8: Stopping the Wall-run Mid Animation (Part 2)

Image
After the half term, I opened my project and took almost everything I did before in the player blueprint and left the animation blueprint as it was and here what I did. I'm not actually sure what I did differently to make it work, but I'm just happy it did.

Unit 8: Adding a new climbing feature.

Image
During the half term, I had the idea of adding some new things to the climbing system. So I began to think, what type of features of modern games with climbing in them have. Well if you fall a large distance there is a different animation that plays and it often ends with a roll, maybe some variations in the ledge climbing animations and maybe a slide. So my plan for today is to add and troubleshoot a long falling and a rolling animation for my climbing system. Well, I like the idea of a different animation playing if the player falls further so we will start with that.  As you can see I have played around with some was to do this but I've been having trouble with getting the play blueprint and the animation blueprint to communicate to each other, making it so I cant change the animation. Today I came on and continued to troubleshoot for a while. Around 7 mins into the prosses I had a semi-working system but then I messed it by confusing...

Unit 8: Stopping the Wall-run Mid Animation (Part 1)

Image
Today I also wanted to try and make the wall run animation stop as it gets to the top of a wall because at the moment it continues to play the animation. So to fix this I got the function that I made the other day that detects if there is a ledge there, when it is active it should stop the wall-run however you can see in this video it doesn't work. I continued to try other things to get it to work but they were all futile. Towards the end of my video, I found out that the node "montage stop" waits until the montage has actually ended, this means that I cant actually stop the animation until the end of the montage. To fix this I plan to shorten the montage to one step and to make an interest to count up to a certain number and then stop the montage so that the player cant wall run forever. I didn't finish this today, I will continue after the half term.

Unit 8: Smoothing out the Wall-Run.

Image
As I said i wanted in todays plan, I found out why my character wasn't playing the animation. It took me only a few moments though. My ledge grab animation can only be played if the player begins a jump onto it or is jumping as they do it. this meant the animation wouldn't play state after the wall run. As you can see in the video I made a completely new variable for it but that made another bug for it, so what I did is that after the wall run animation is played I make the boolean "can grab" true and it then lets the player grab the ledge after wall running. You can see at the end there is still a little bump but I might be able to fix that with playing with some numbers.

Unit 8: Starting to do Day Plains.

I have decided to begin to make a list of things that I want to get done on that day. These will mainly consist of a list of task and maybe a few screenshots. This is mainly for my own benefit and will hopefully help me get into the correct mine frame. I got this idea after watching a youtube video by ThinMatrix, Here is the link  (Time Stamp 0:23) My plan for today: To find out what is causing my character why my character isn't playing the ledge grab animation after wall running. To stop the wall run if the character reaches the top of the ledge.  To figure out what is causing my character to teleport to a different location after some wall runs.

Unit 8: Refining the Climbing System.

Image
Today I wanted to try and make the climbing system run more smooth. So I began to think, what would help to do this, maybe I need to add checks for the other parts as well as the ledge grab. I began to look around my code to see what checks I had and how well they worked. I then proceeded to add them to different parts of the climbing system, as you can see here. I was trying to make a check where it would detect the floor underneath you and if the floor was there it would turn your characters movement mode into walking. As I was trying to do this I made a new bug where I floated on the building. Here is me trying to fix it. As you can see I tried a few things to fix the issue of floating on top of the roof, (Time stamp 0.03) but once I did that I had another issue, the fix stopped me from being able to climb up the ledge (0.40) and if I got rid of the fix I would float again. So to fix this I made a trace channel to detect when I'm on the floor...

Unit 8: Doing Some Bug Fixes

Image
Today I have dealt with some bugs that I found during the demo day. The bug was that players could grab a wall even if there wasn't a ledge there. Here is a video of me doing it. As you can see I have made a tracer above the players head that check if there is something blocking it and if there is it will not let the player grab the ledge. 

Unit 8: Reconsidering and Making Changes to my plan.

Today my plan was to make a rubbish bin to put in the alleyway of my setting. Here is the time-lapse video: As you can see I didn't get to finish it, and this isn't because I ran out of time or because I got really frustrated. But while I was struggling to make a basic box with a lid I realised that this most definitely isn't my strength, nor is audio development. My strength is in programming and I wasn't going to play into that if I carried on with this journey. So I think I'm going to try and flesh out the climbing system and maybe try and add some sort of combat system.

Unit 8: Demo Day 1

Image
Today we had a demo day. A demo day is where we all go around and play the games of our peers and I ran a little experiment in it. I ran a survey and asked people who played my game what the theme might be with the game will be. I made a grey box level and see what they said. Here are the results: It looks like people can see what I was going for.

Unit 8: Problems with the Climbing System, again.

Image
I was having problems with getting the character to climb all of the walls, but that didn't take long to fix, when I tested it, I could climb all of the walls. however, after fixing that I realised that now had a larger problem, something that I didn't have to deal with in my last project. As the character climbs up one wall, it recognises the ledge about the one it needs to climb. Here is an example of it.  To fix this I began to troubleshoot my game. I try a few things first, I had to find the problem that was causing it, so the logical source of the problem would the ledge tracer. So to check if this was the problem I put the ledge tracer to be on in debug mode, persistently. Then I started the game and saw that it was triggering with the blocks above me. So be I began changing variables in the blueprint that relate to the ledge hight tracer and look at where it moves the tracer ( the green and red sphere). Then through trial and err...

Unit 8: Making Textures

Image
I took the photo I took at work and did this in the video. You can see that I used the clone stamp tool, filters and select colour range.  You can actually see me changing my mind half way through when I started to use the blur tool,(time stamp 0;43) I realised this wouldn't be any good so I began to explore. As I hovered over the tools I realised that they would show tutorials. I saw that the clone stamp tool lets you click on one place and it paints the point yours over your image. At 1:21 you can see that I use the smart sharpen filter, this just made the small stones in the texture look more defined.